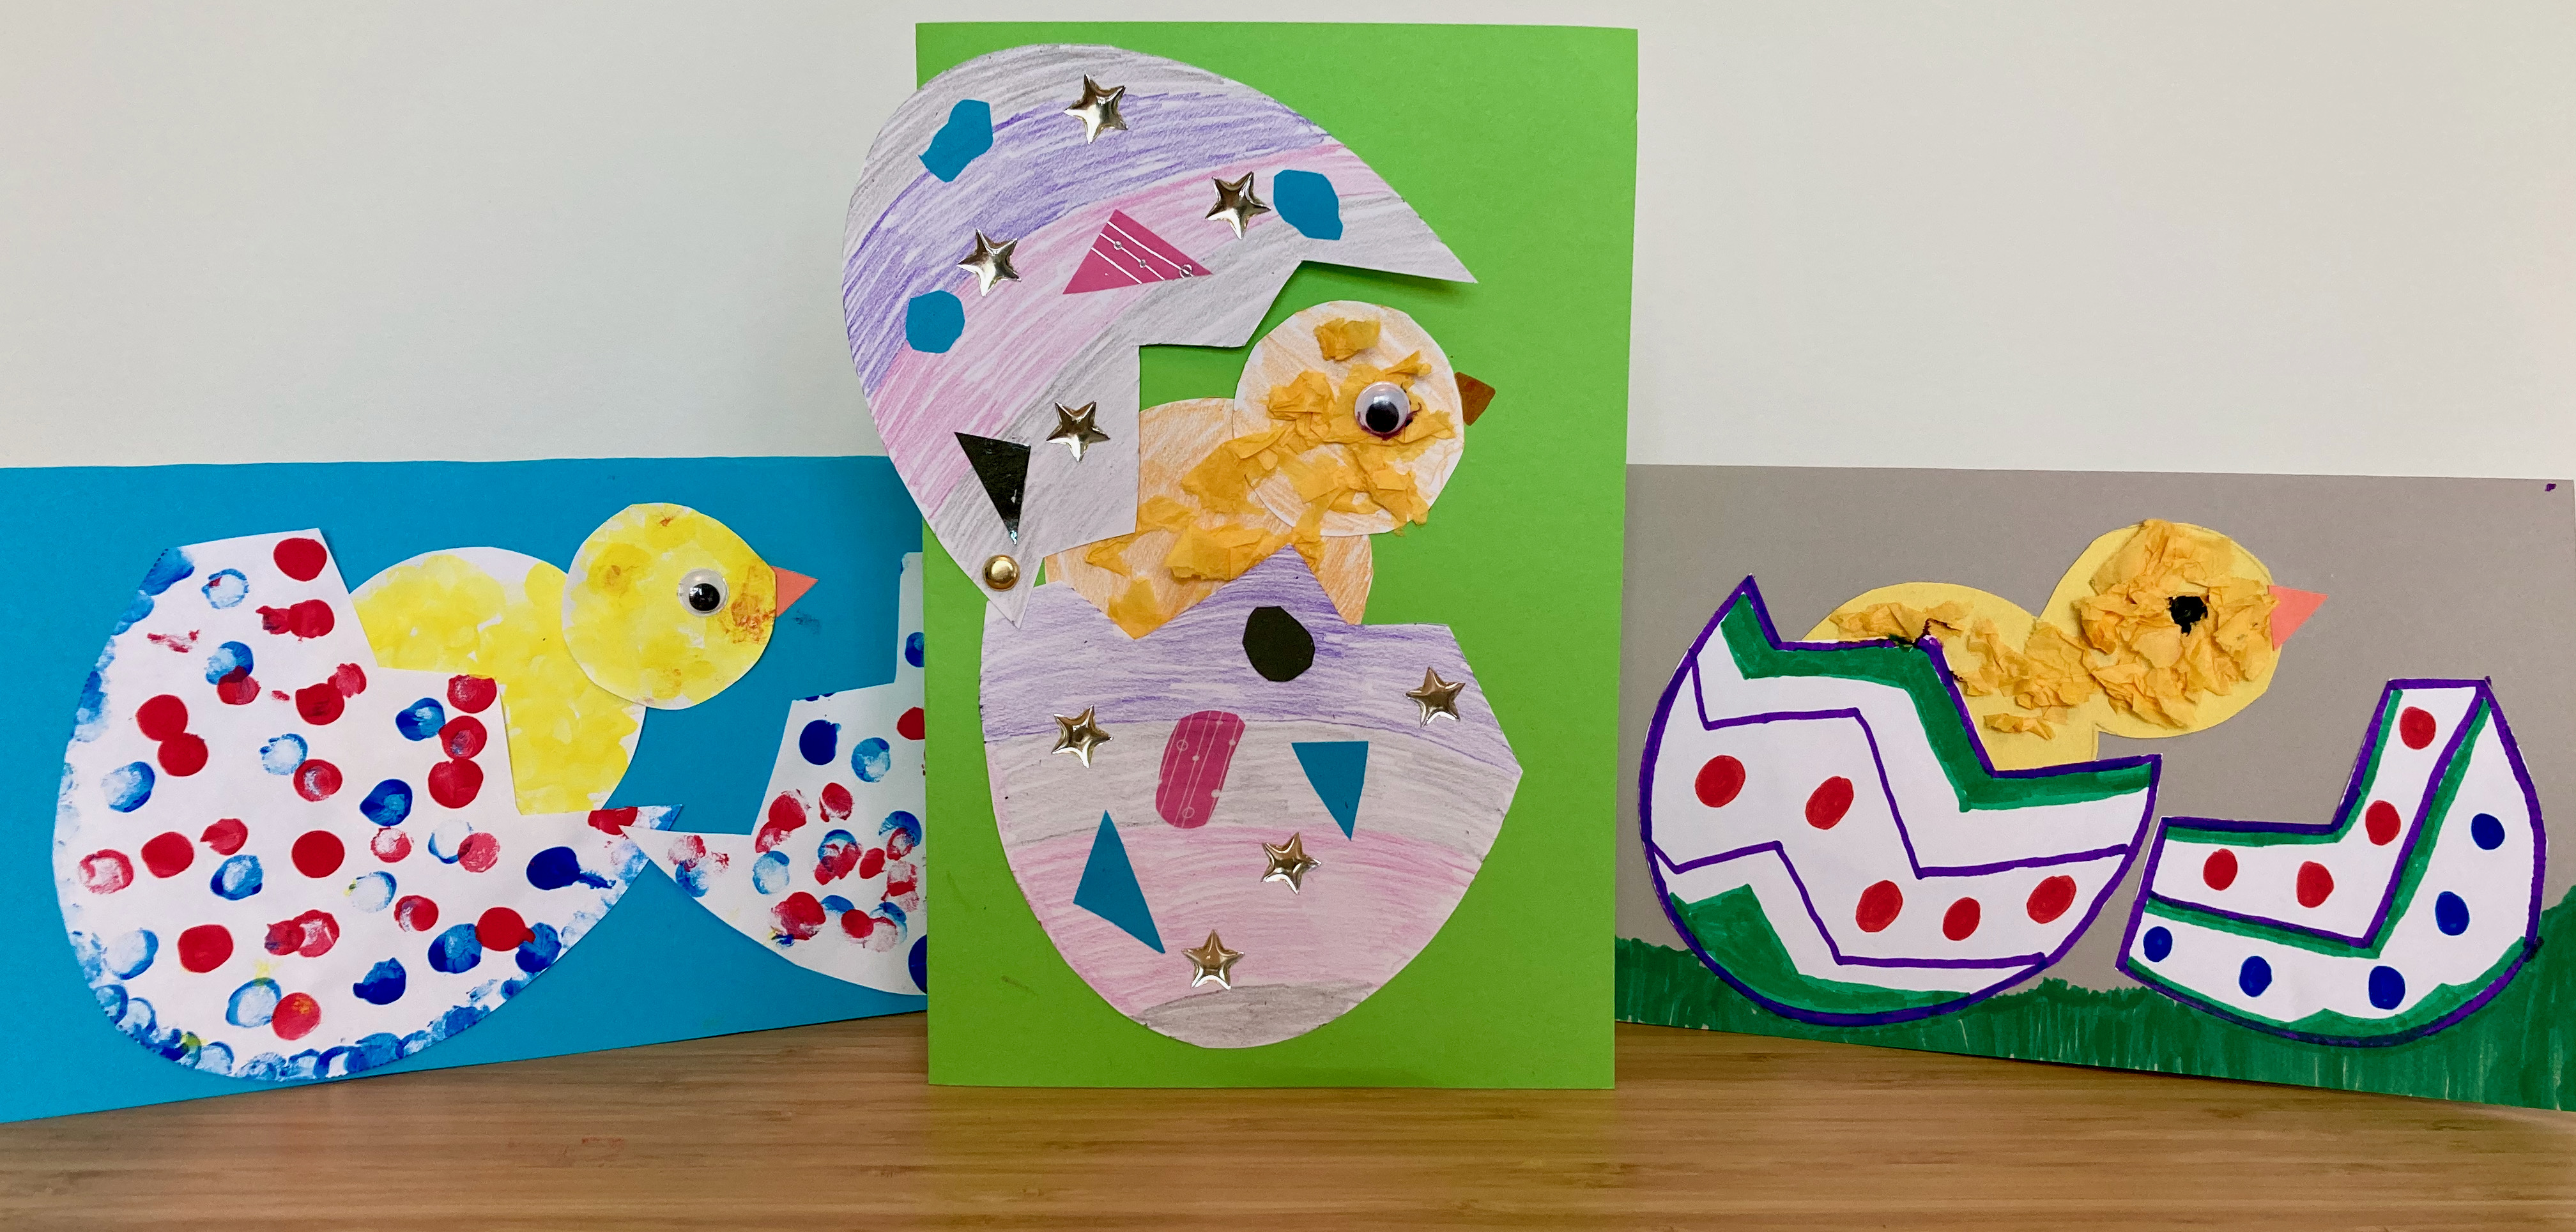
Hatching Spring Chick Craft
These Spring Chicks are easy to make and look great displayed on a wall, or fridge, or used as greetings cards.
Make the egg open and close and become a design technology detective as you explore using simple hinges and levers.
What you need:
- Card, construction paper/paper (for making the egg and chick)
- Materials for decorating your egg and chick with e.g. colouring pens and pencils, crayons, paint, tissue paper, recycled wrapping paper or fabric, clean foil sweet wrappers
- A piece of paper or card (to stick the chick and egg on)
- Pencil
- Scissors
- A glue stick or white craft glue (Top tip: White craft glue dries clear)
Optional
- A paper fastener (brass plated fastener) for making an egg that you can open and close
What to do:
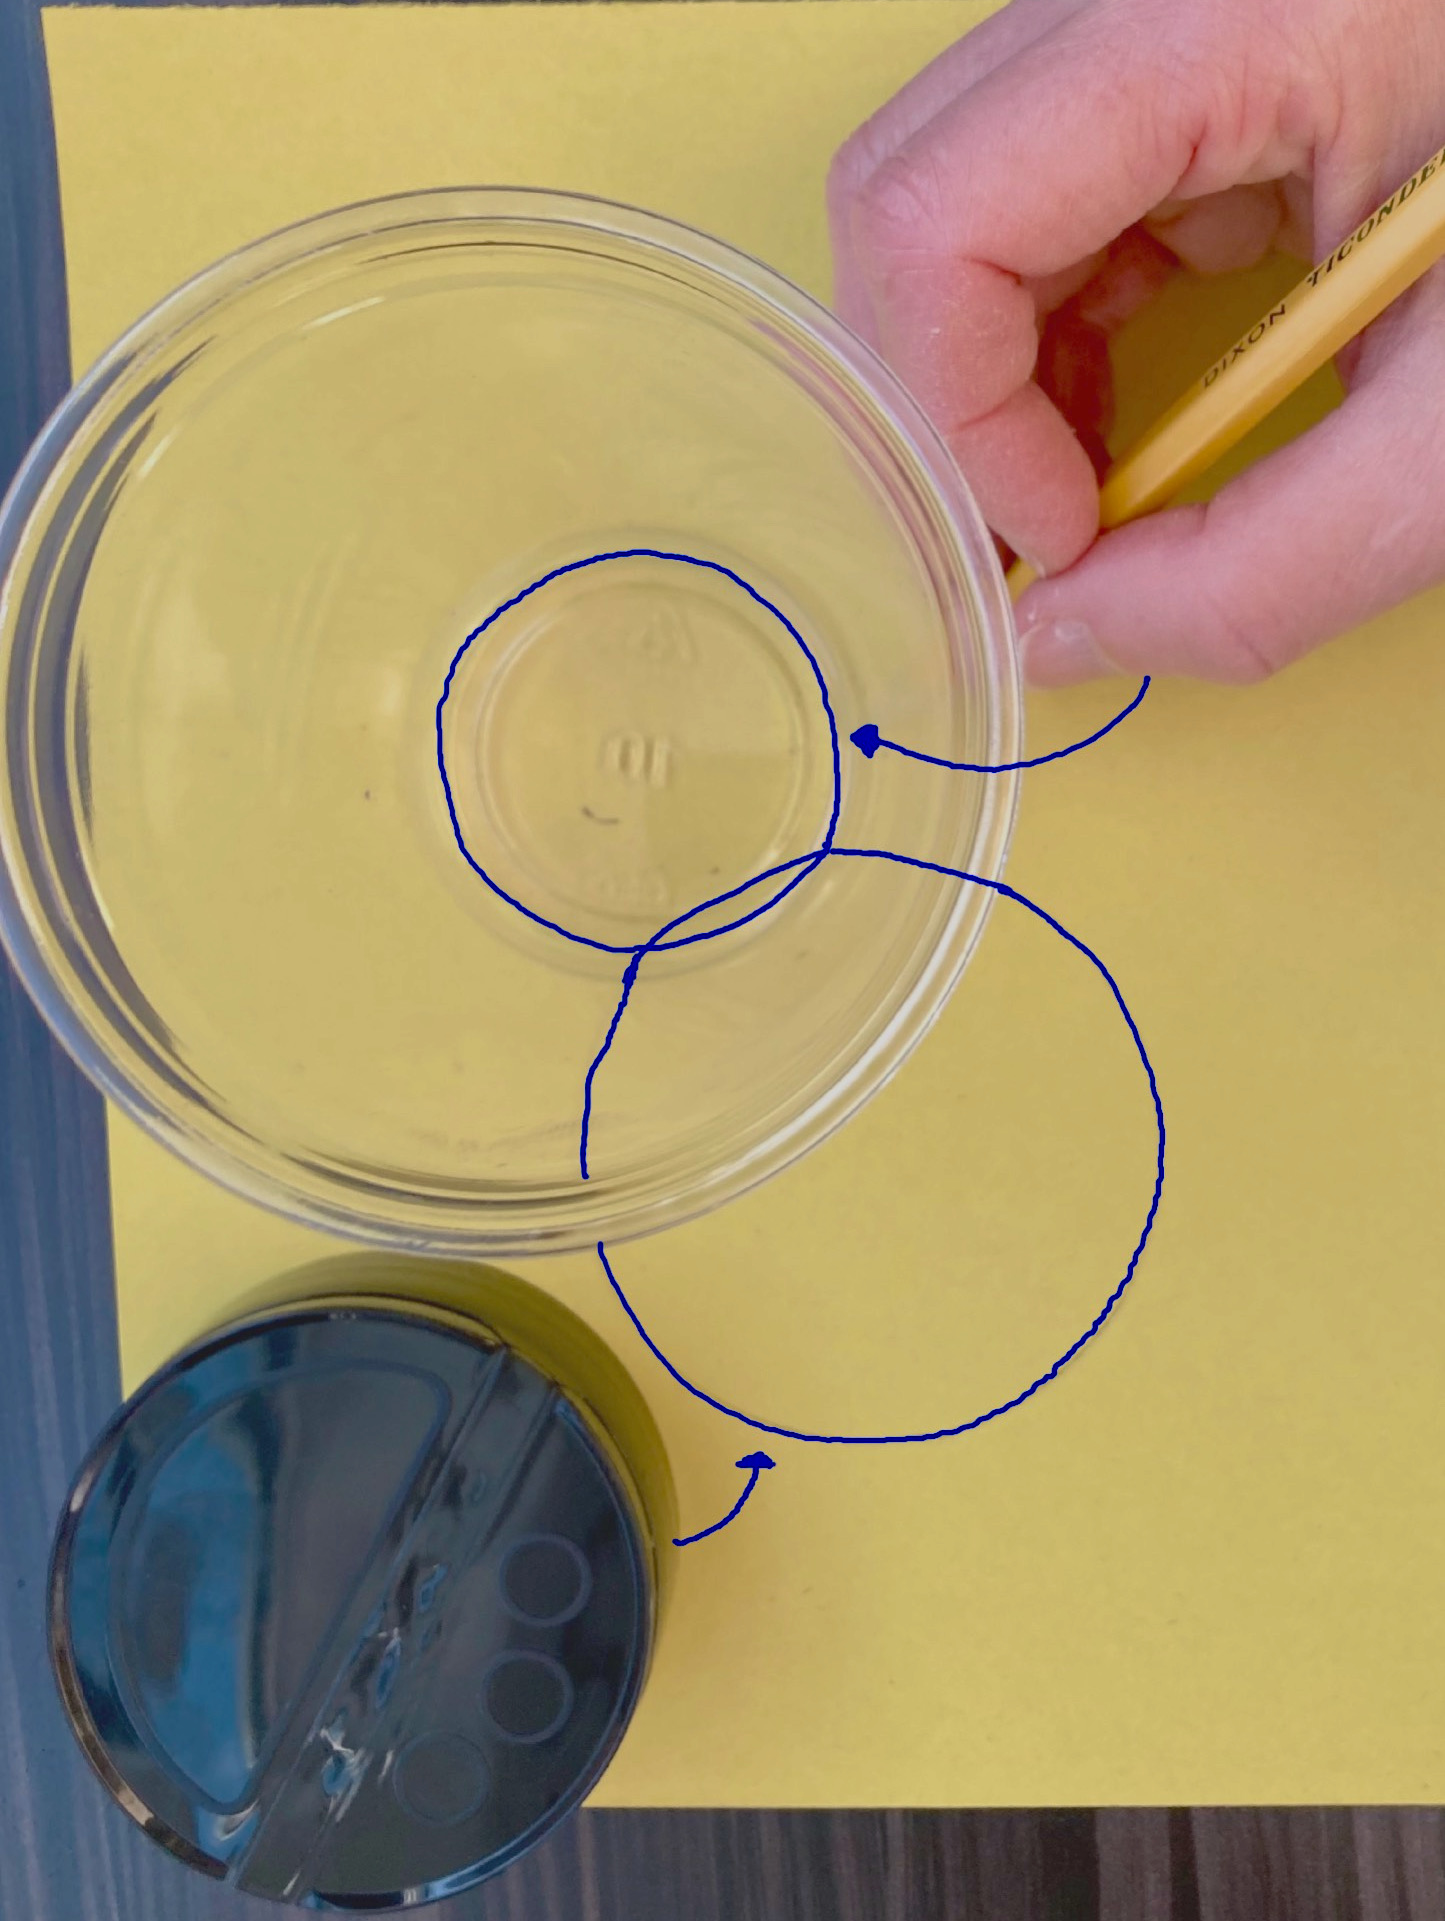
- Take a piece of paper/card and use it to make a chick. Make your chick by;
-
drawing your chick free-hand
-
drawing around two different sized circle shaped objects (see below)
- or cutting out and drawing around the circles on the free, printable Spring Chick template.
-
Decorate your chick. Be creative.
-
Take another piece of paper/ card and draw an egg shape on it. Cut the egg out.
Top tips:
- Make sure that the egg you draw is smaller than the paper/card that you are going to fasten it to and bigger than your chick.
- You can cut out and use, or draw around the egg shape on the free, printable Spring Chick template.
- If you want your egg to open and close, make it out of card. It will be stronger.
-
Cut your egg in half so that it looks as if the chick has pecked its way out of it.
-
Decorate both pieces of the egg.
-
Place another piece of paper or card flat on a surface. This will be the base for your art work.
- If you are making your Spring Chick art into a card, fold this piece of paper/card in half. Place it on the surface so that the folded edge is either at the top of the card (furthest away from you) or at the left-hand side of the card.
-
Place your chick on top of the base paper/card. Move it around until you are happy with where it is and glue it on.
-
Place the bottom half of the egg on the base paper/card, so that the chick looks as if it is just popping out of the egg, and stick it down with glue.
-
Either;
-
Place the top part of the egg where you want it on the base paper/card and stick it down with glue.
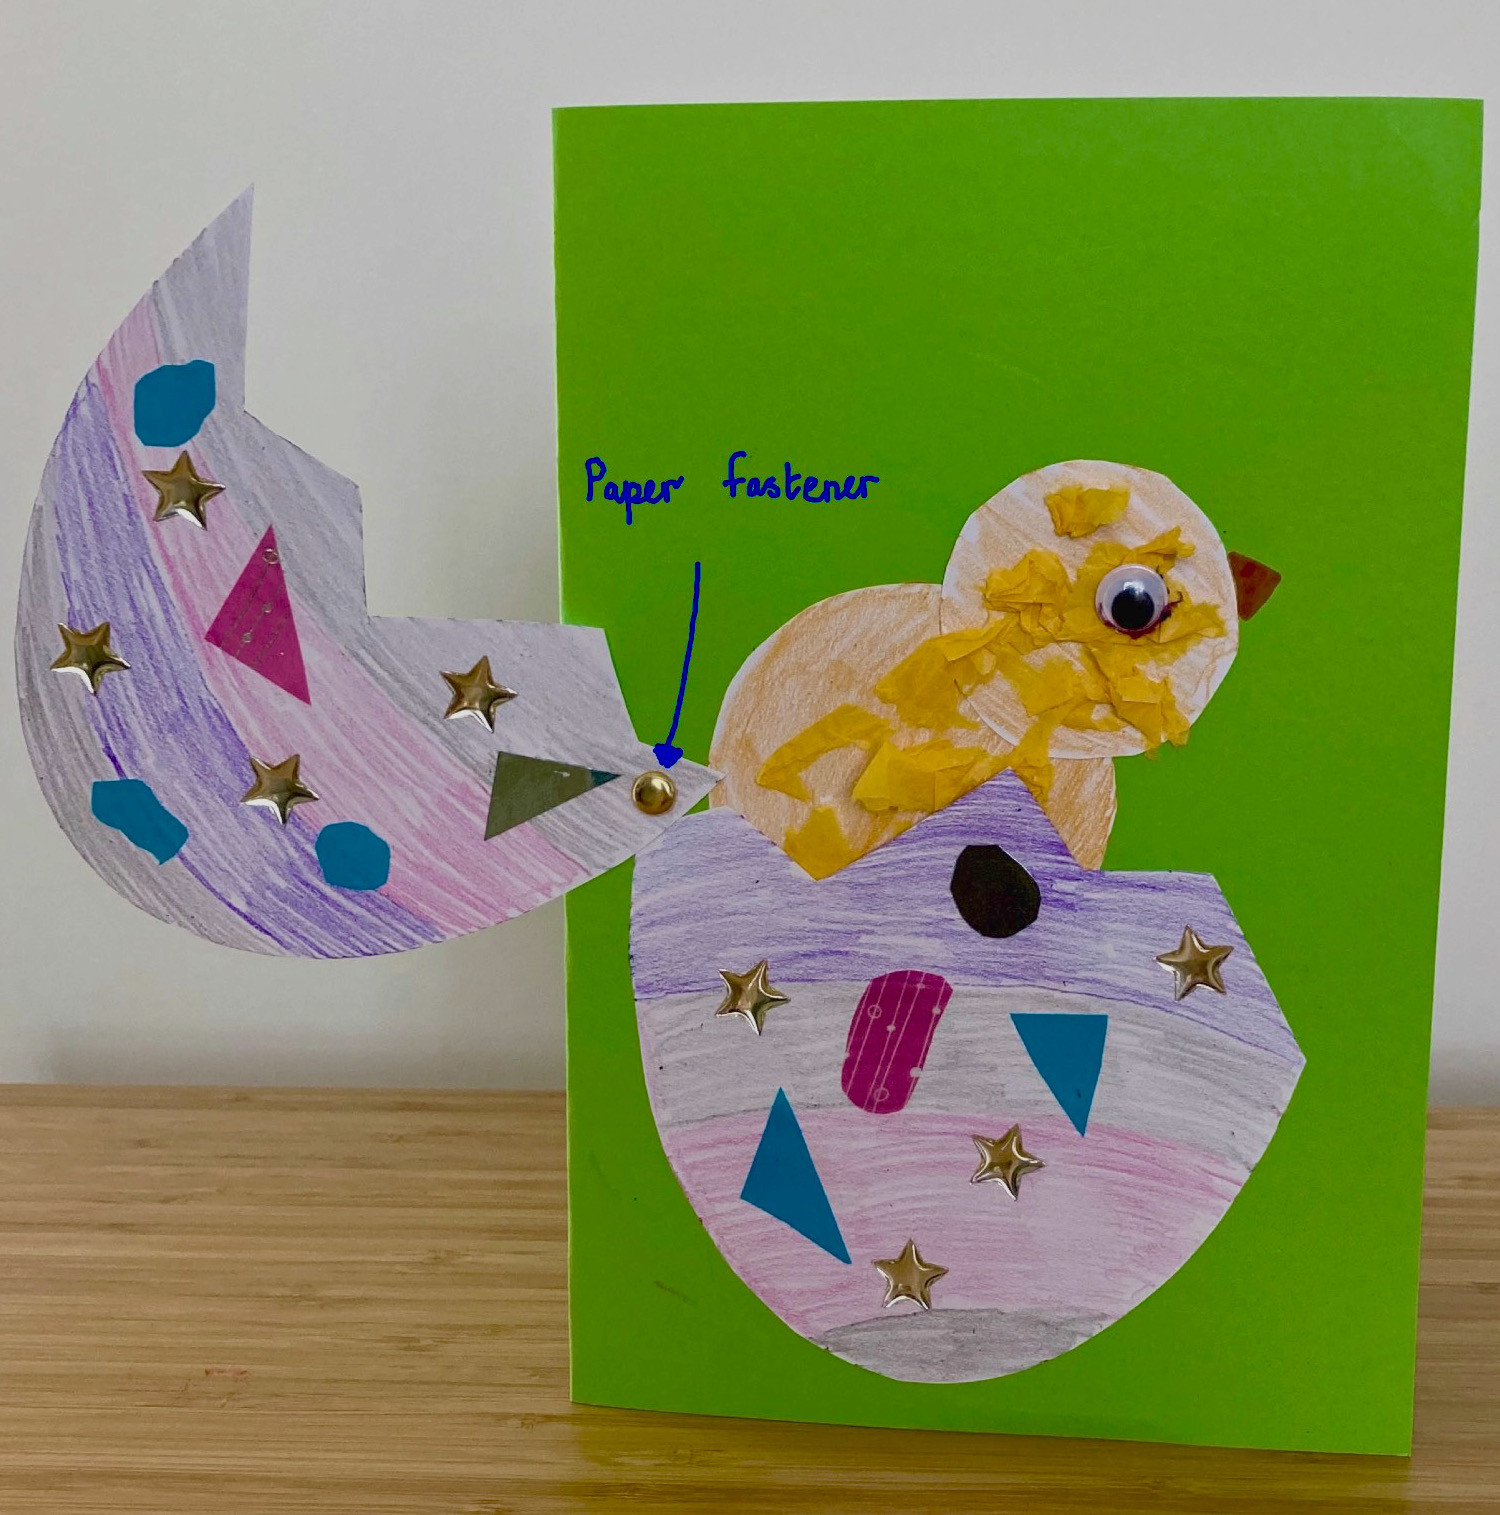
Or, to make an egg that opens and closes;
-
Place the top half of the egg over the chick (so that the egg looks whole again and you cannot see the chick).
-
Carefully, push a paper fastener through the bottom left or right hand side of the top half of the egg and the base card.
Top tip: If you are making a greetings card, make sure that you unfold the base card first, so that it is its original size, before pushing the paper fastener through it.
-
Turn over the paper/card. Push the two legs of the paper fastener apart until they are lying flat against the card/paper.
-
You will now be able to move the top half of the egg to reveal and hide the chick.
Activity develops:
- Fine motor skills and hand eye coordination
- Language skills, including mathematical vocabulary related to shape
- Understanding about simple hinge and lever mechanisms
- Creativity