Weave and Recycle
Looking for a no mess craft that will keep your kids busy?
Let them get creative with just a piece of card and some strips of recycled paper, ribbon, fabric etc.
What you need:
- A piece of card-stock, or card cut from a used e.g. cereal box (If this is your first attempt at paper weaving, an 8.5" x 11" or A4 sized piece of card is a goods size to use)
- Strips of paper and/or other materials the width of your piece of card. (Experiment with colours and textures by using recycled wrapping paper, coloured paper, ribbon, pipe cleaners, fabric etc.)
- Adhesive tape
- A pair of scissors
- Ruler
- Pencil
Top tips:
- Using a heavier weighted card makes it easier to guide the strips of material through the weaving without it tearing.
- Consider pre-cutting the strips of paper/material for younger kids or for kids who have never done this before.
What to do:
- Fold the piece of card in half. (If you are using an 8.5" x 11" or A4 sized piece of card fold it in half along the shorter side)
- Place the card in front of you so the folded edge is nearest you and the open ended edge is furthest away from you.
- Place the ruler about 2.5 cms down from the top (open) edge of the folded card.
- Draw a horizontal line across the card.
- Starting about two fingers width (2cms) in from the left- hand edge of the card, position your scissors on the folded edge of the card.
- Cut towards the open edge of the folded card stopping at the line you have just drawn.
- Place your ruler along the folded edge of the card and use a pencil to mark a point 2cms to the right of the line you have just cut. Place your scissors on the mark.
- Cut a line from the mark you made towards the open edge of the folded card stopping at the pencil line.
- Repeat steps 7 and 8 until you reach the other side of the folded card.
Top tip: Using widely spaced cuts makes the activity easier. Making cuts that are closer together will make the card more fragile and weaving will be trickier. Experiment with your weaving designs by spacing the cut lines differently.
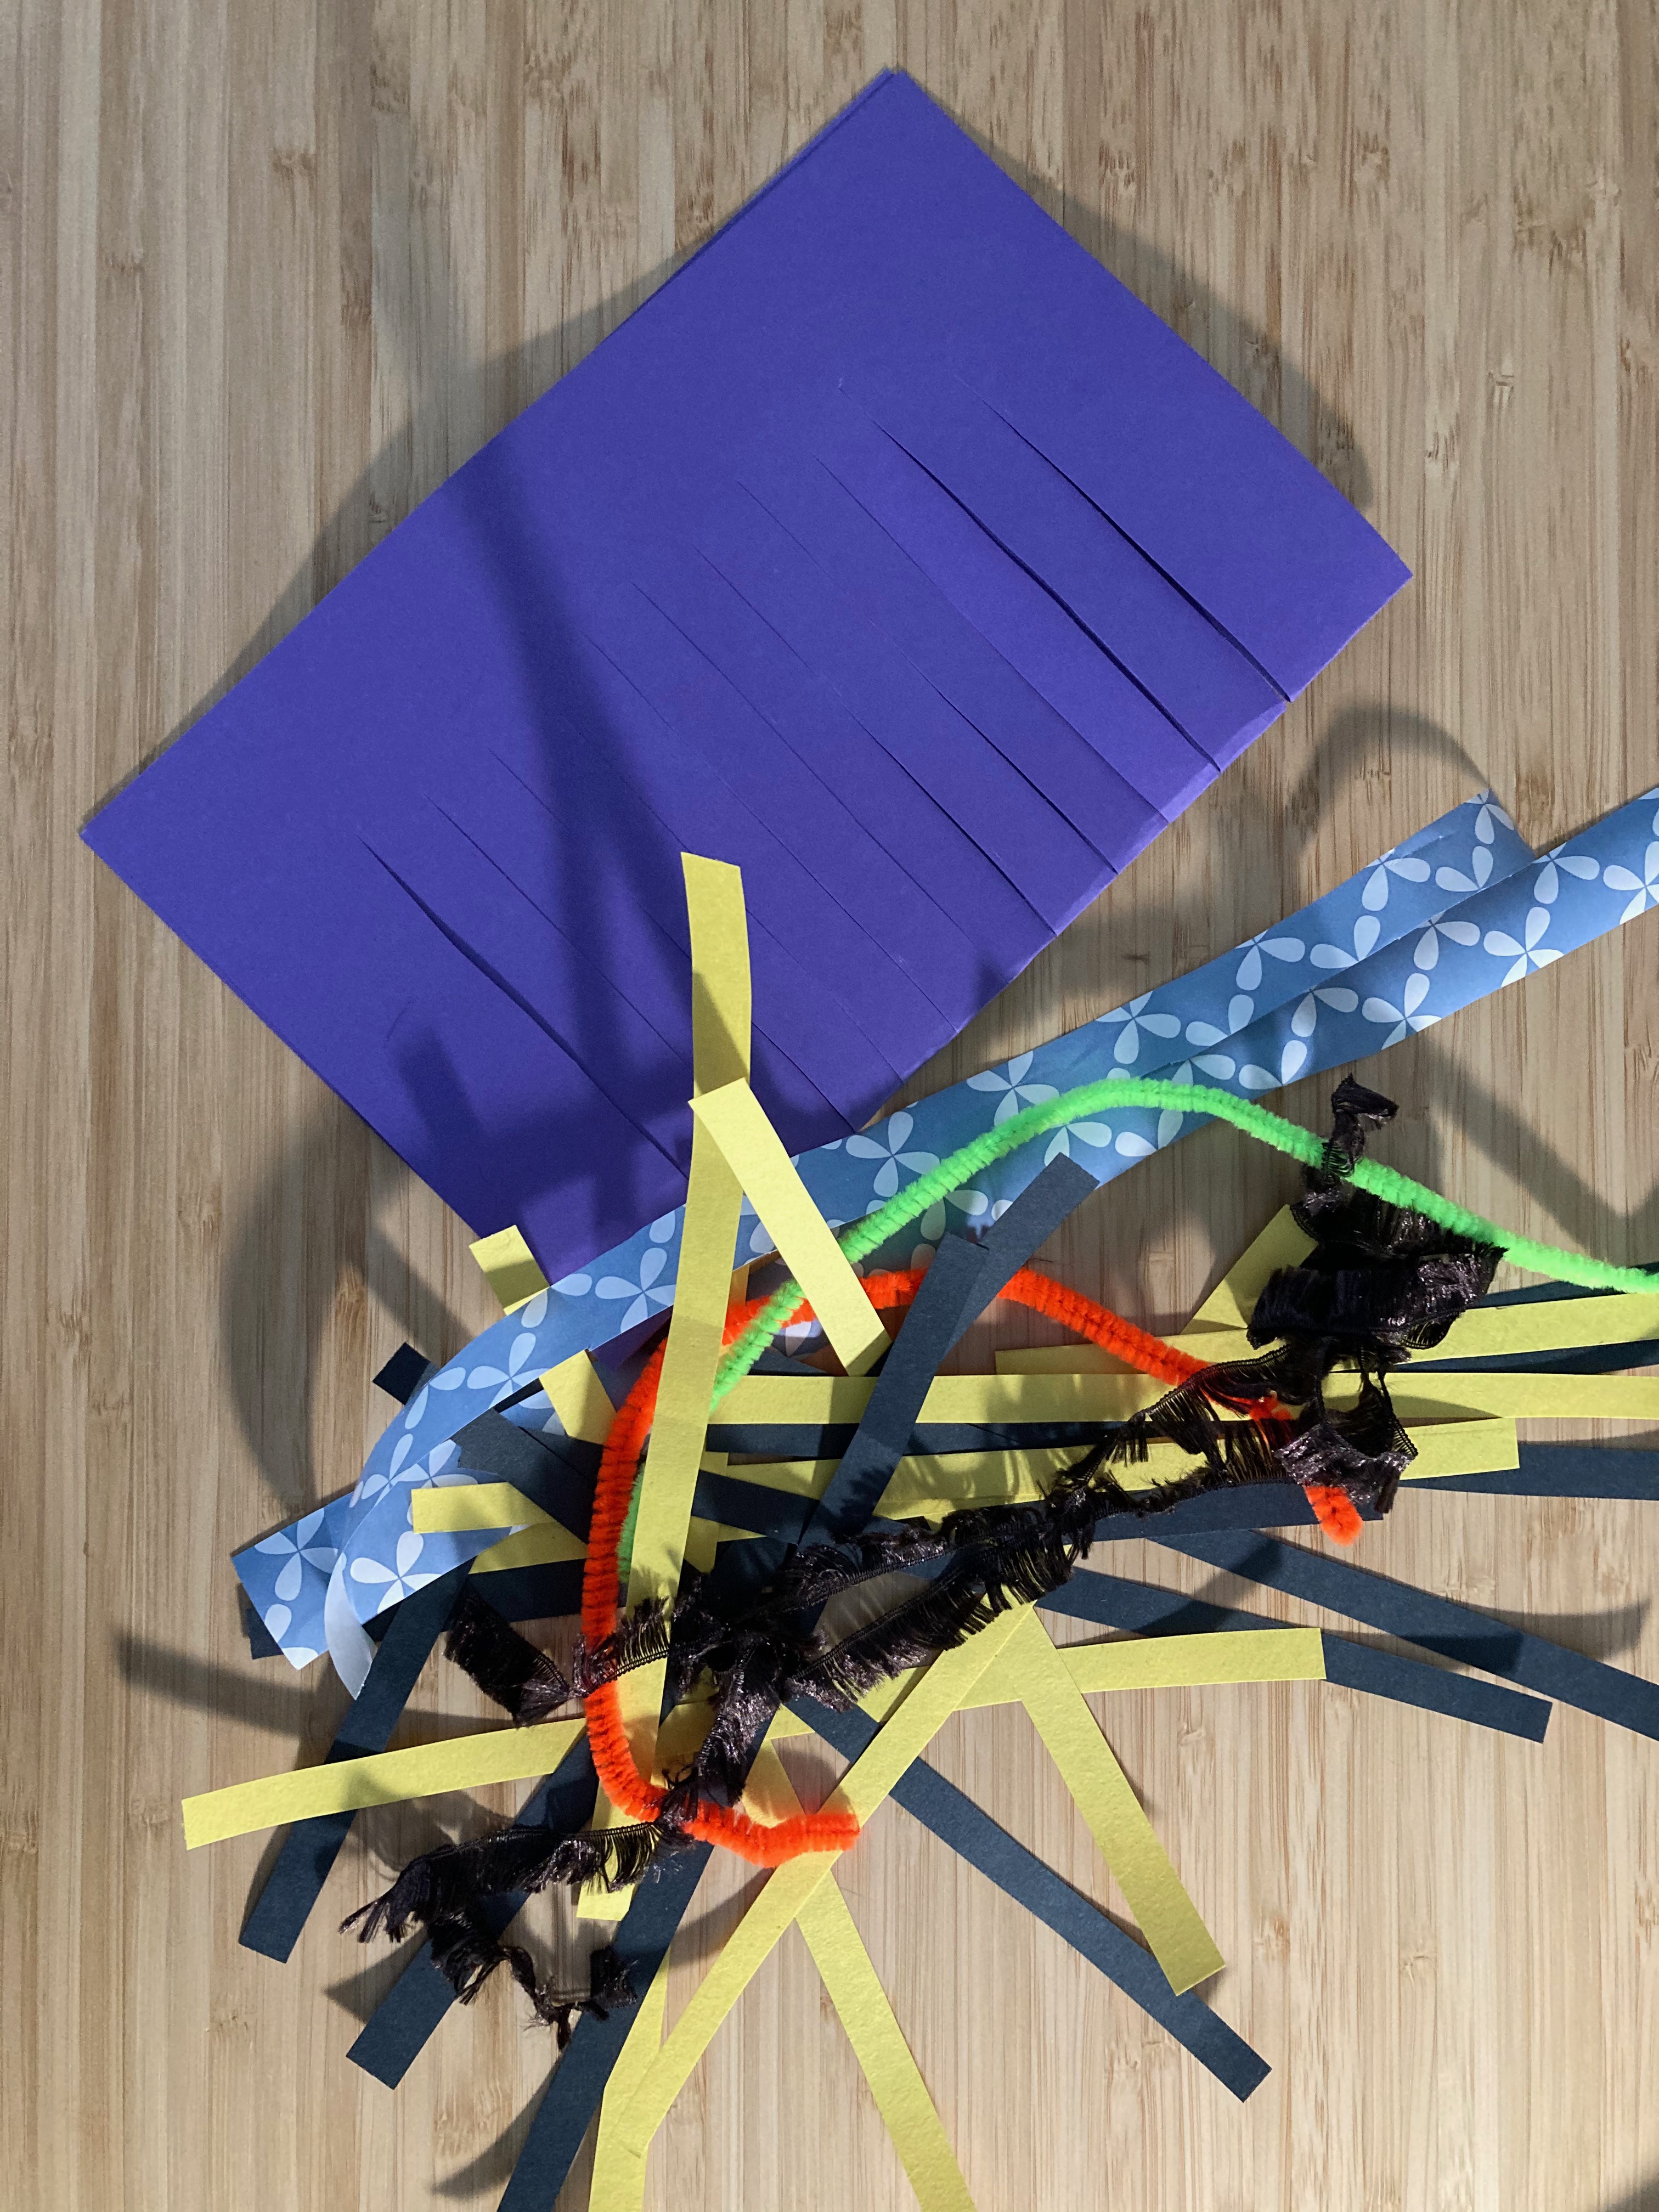
- Unfold the card.
-
Take a strip of paper/material and start weaving it through the cuts in the card. (It is a good idea to start your weaving at either the top or the bottom of your card)
To start weaving
(a.) Push the short edge of the strip down through the first cut (under the card).(b.) Push the strip back up through the second cut (so that you can see it again).
(c.) Repeat steps (a.) and (b.) using this under, over pattern until you have woven your strip across to the other side of your card.
(d.) Take another strip of material and alternate the weaving pattern. This time start with the strip under the card and push it up through the first cut. Then push it back under the card through the second cut. Continue weaving using an over, under pattern.
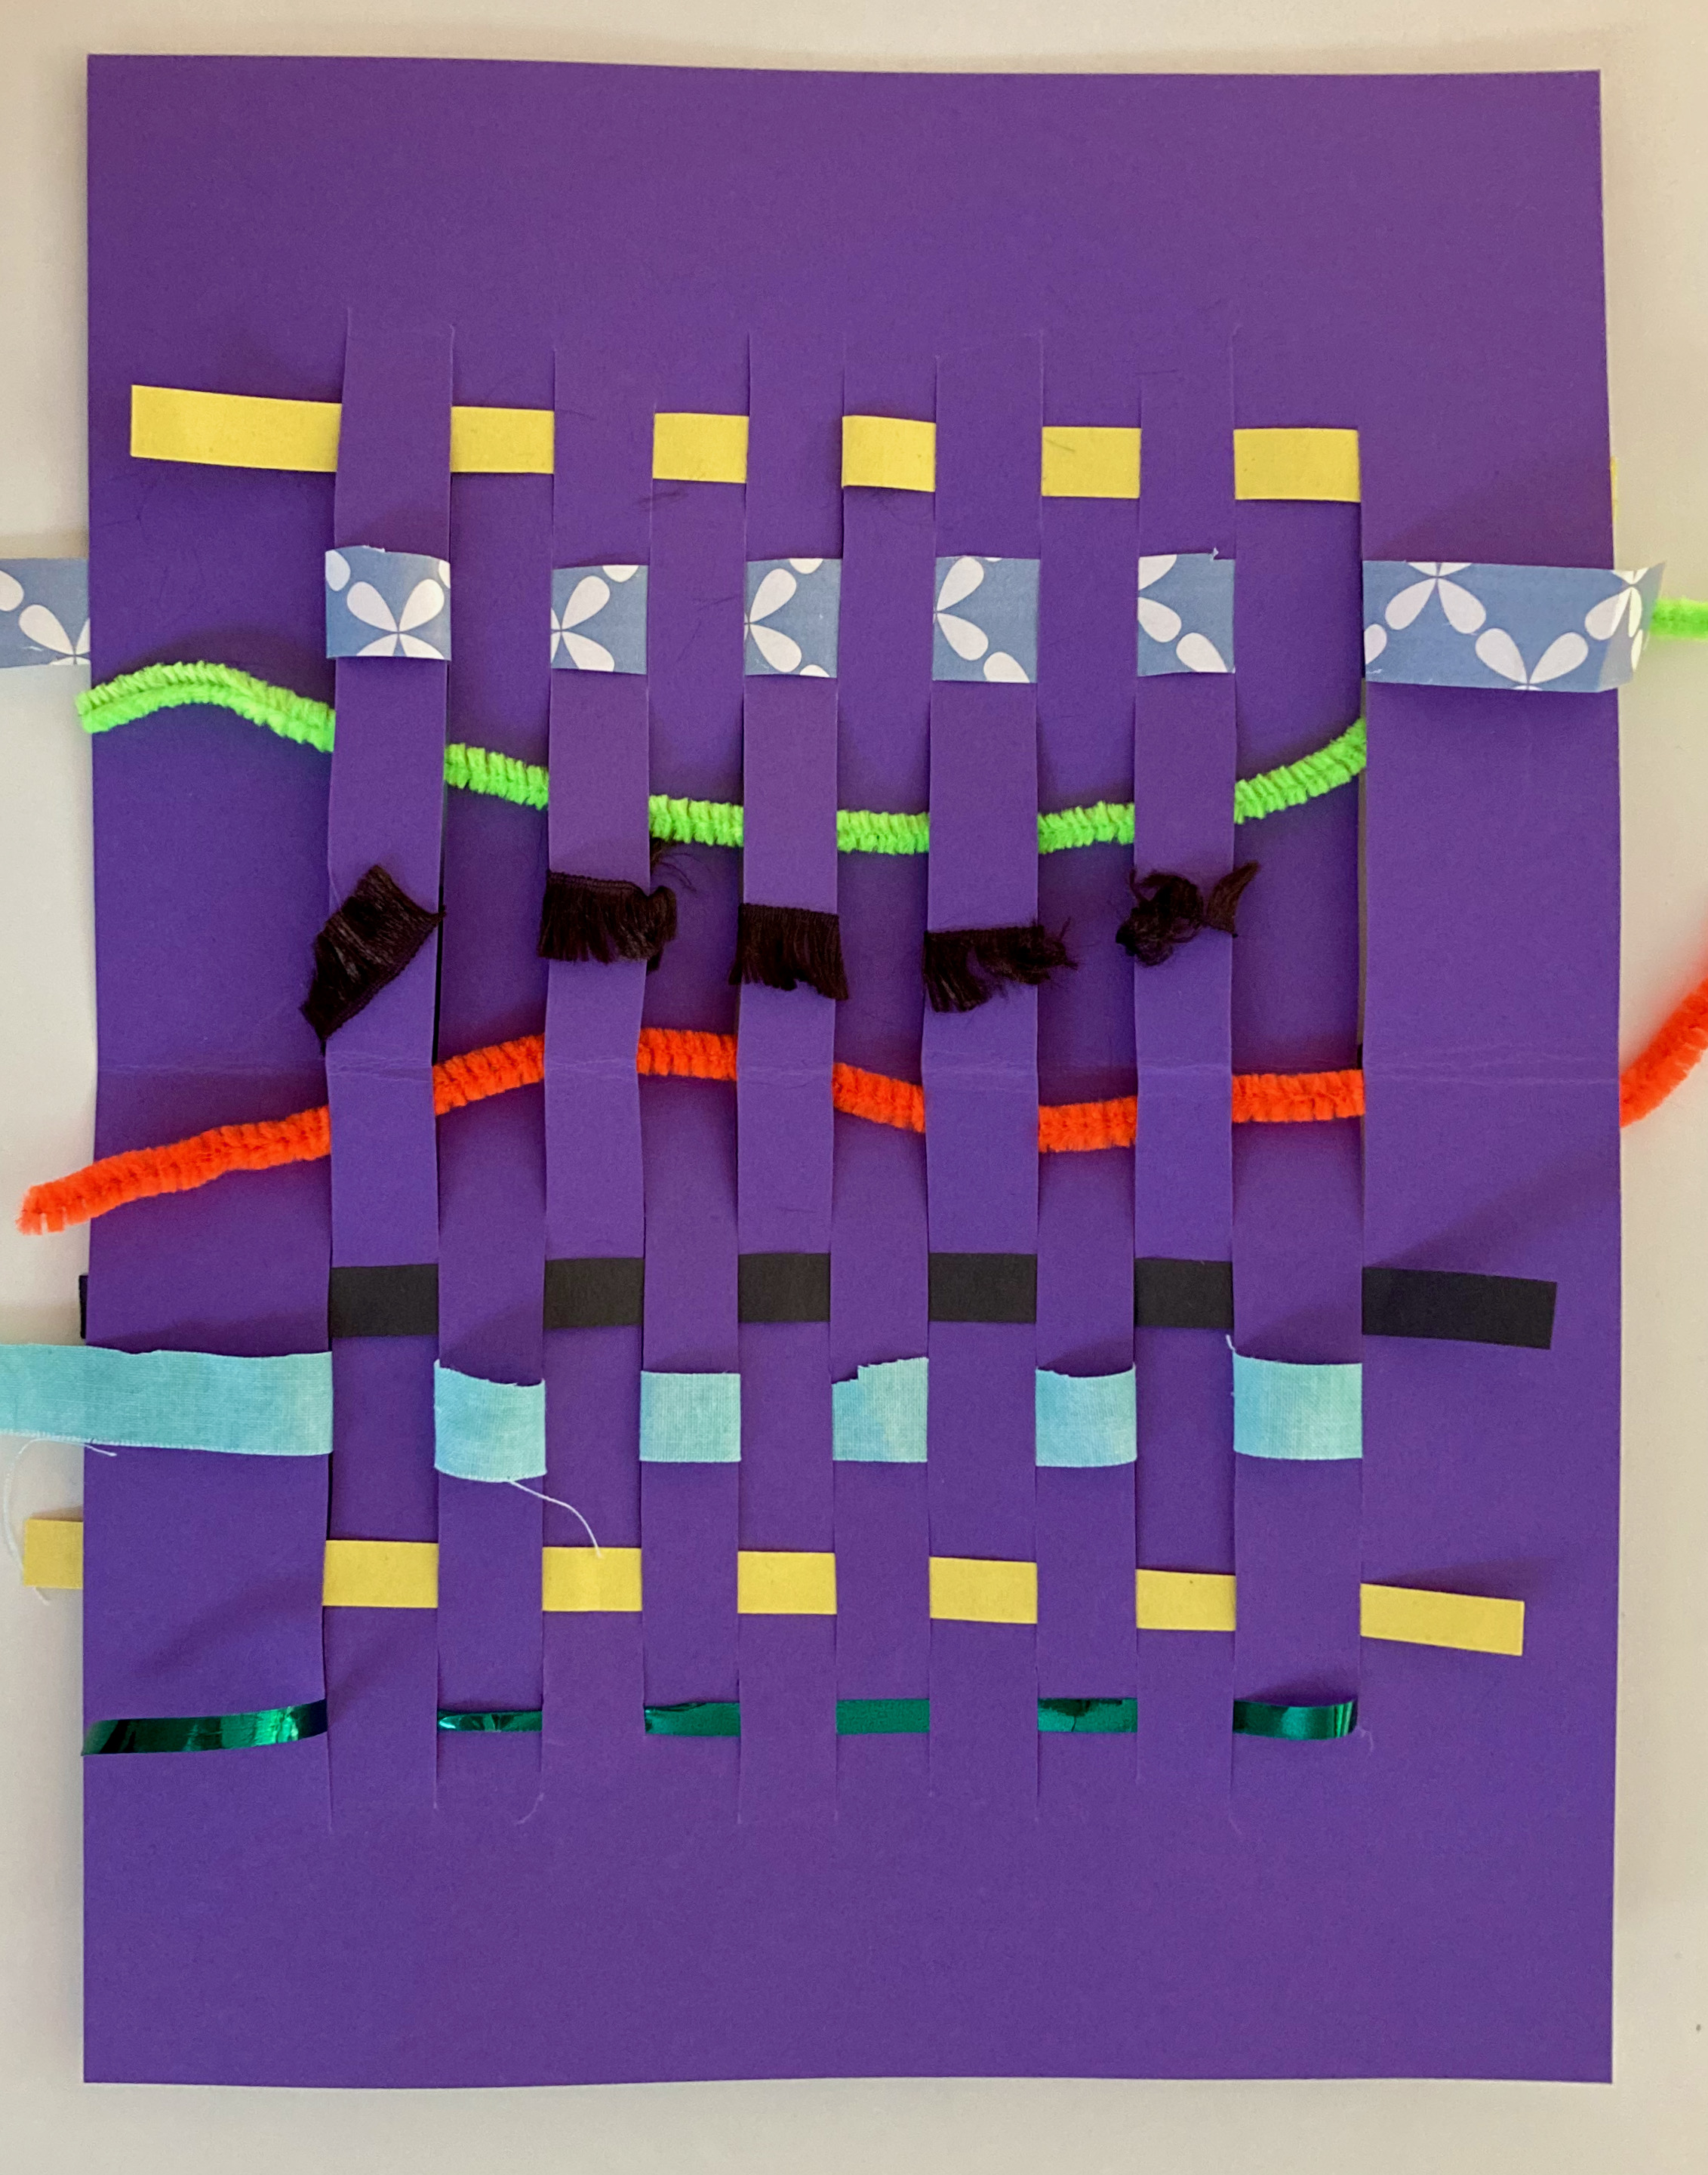
Weave with strips of material, alternating the under, over and over, under patterns, until you have filled your card. If you want to, fold the ends of the strips the back of the card and tape them down with adhesive tape.
Display your weaving on a wall or fridge or make it into a greetings card.
Activity develops: Fine motor and language skills, hand eye coordination and creativity. Read more in Crafting with kids